
I was in my basement shooting my little diecast Pagani supercar, and I remembered a technique I had seen somewhere using a CD to light paint with. I wish I could give attribution to the artist, but I have no idea where I saw the technique, although it might have come from Eric Paré when he used multicolored reflective paper to create a light painting with Mike Campau. The result was an abstract form of light made up of wild vibrant colors. Anyways my idea was to light paint the car like I usually do, and then wave a CD around the image as I shined a flashlight on the CD to see what kind of look I would get. It was a messy process, but that’s the way I like to shoot. Here is how I went about it on this day.
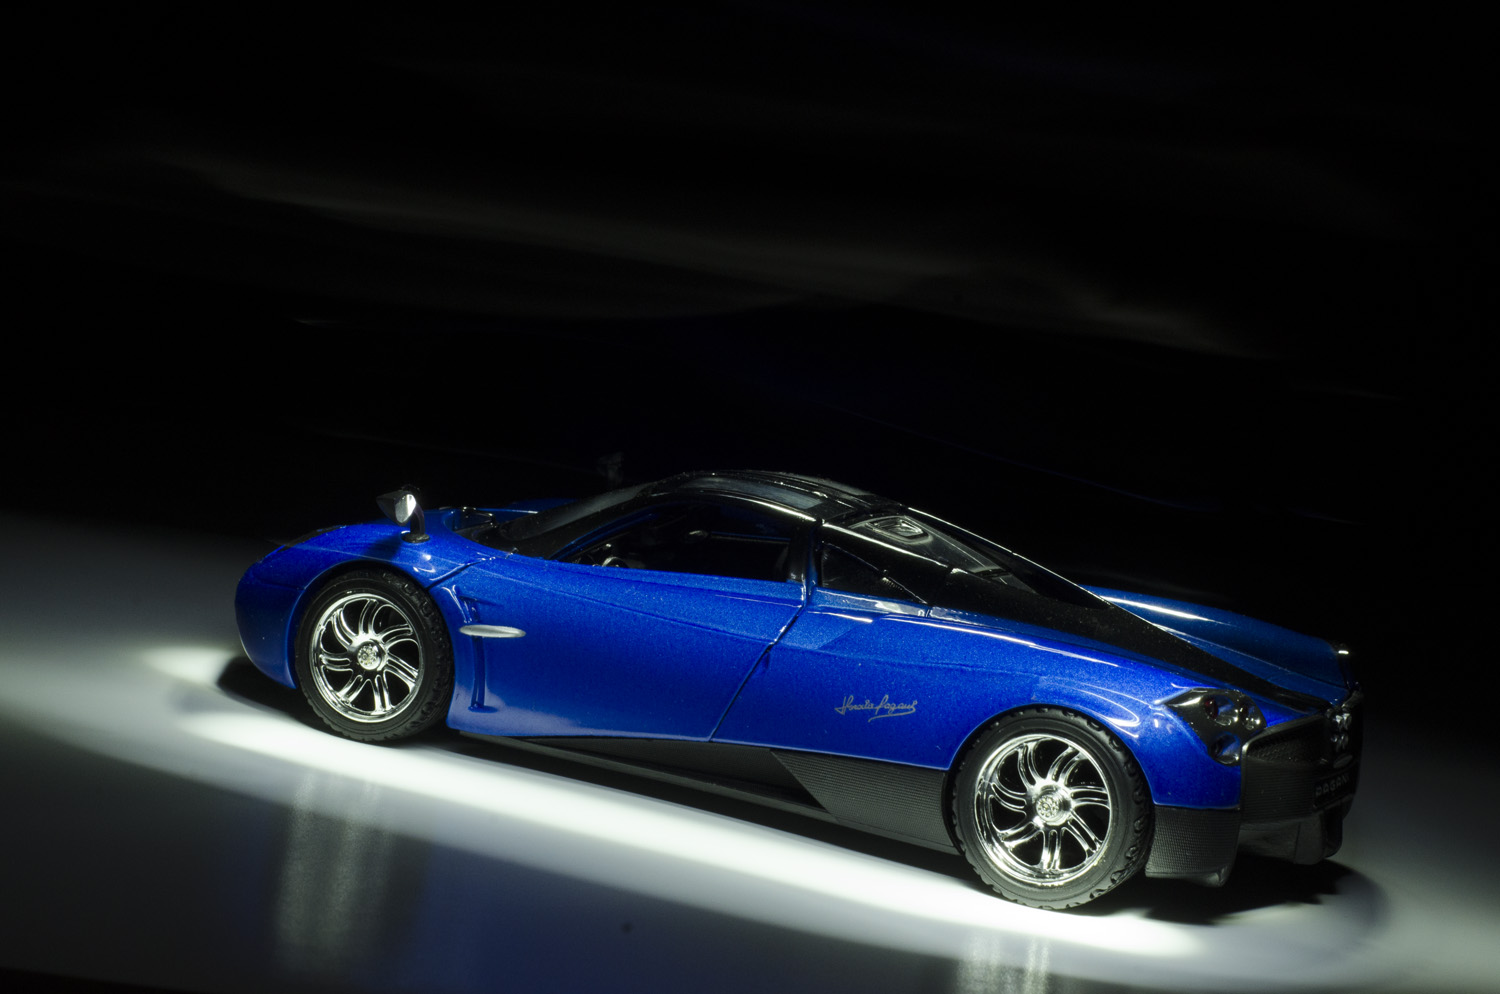
I started out first trying to set up a nice composition with just the car. My camera settings were as follows. Shutter Speed was on Bulb (I was shooting with a shutter release remote), but most of these shots lasted under 30 seconds, the aperture was at ƒ14 and my ISO was set at 800. In the dark the shutter speed doesn’t matter too much, as long as I have enough time to do what I needed to do. I wanted to get a large depth of field so I stopped my aperture down to ƒ14 to accomplish that. With my flashlight, I needed to nudge my ISO up to 800 in order to let in enough light to compensate for the small aperture I was shooting at.
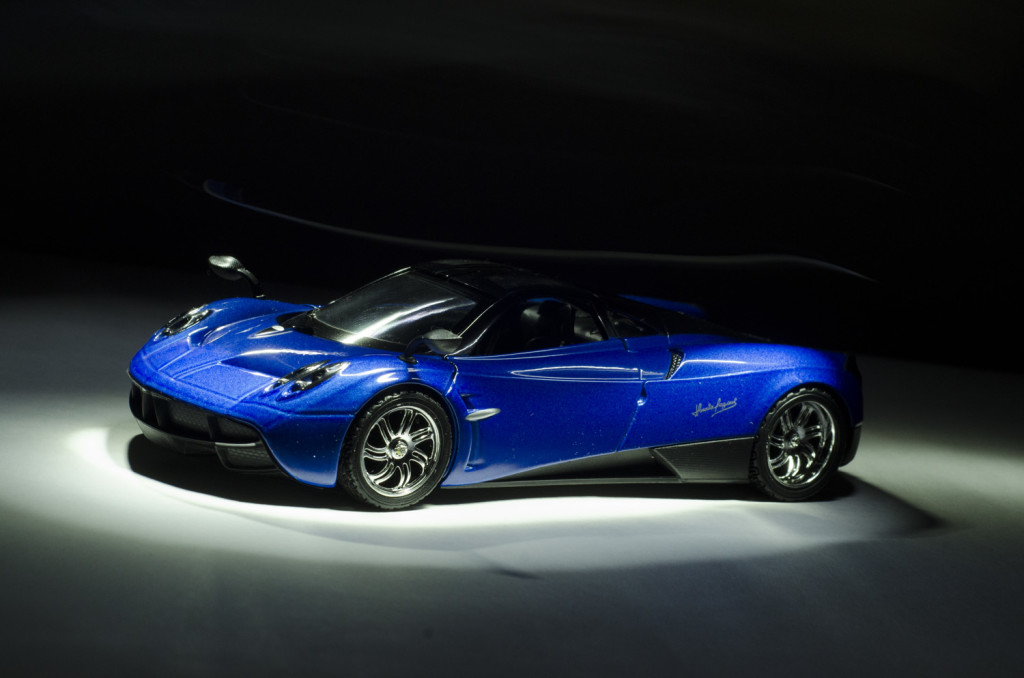
I enjoyed the composition above, but decided I wanted a little more drama, so I started adjusting the car a little bit. I turned the car to the side and rotated my camera a little to throw the composition off axis.
I decided to go with this angle, although I felt that the nose of the car was hugging the front of the frame a bit, so I rolled the car backwards and started to focus on light painting the car first.
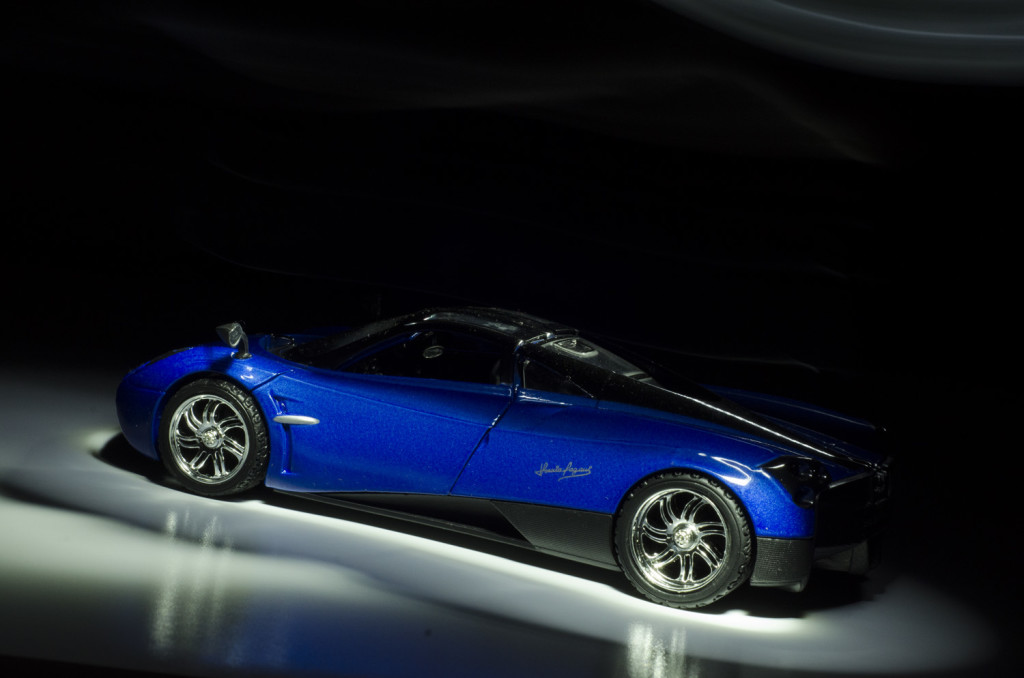
After moving the car backwards, I began to try different lighting patterns.
As you can see, the placement of light on the car can alter the look of the image in a huge way. I played around for awhile trying to perfect the way I wanted to move the light around the car. Basically I would wave the light at a low angle towards the wheels for 2 counts, then move it over top of the car for a couple of counts, then splash it on the front and back quickly to separate the car from the background. Once I was getting consistent results from this, I decided to add in the CD technique.
Here is a look at the progression.

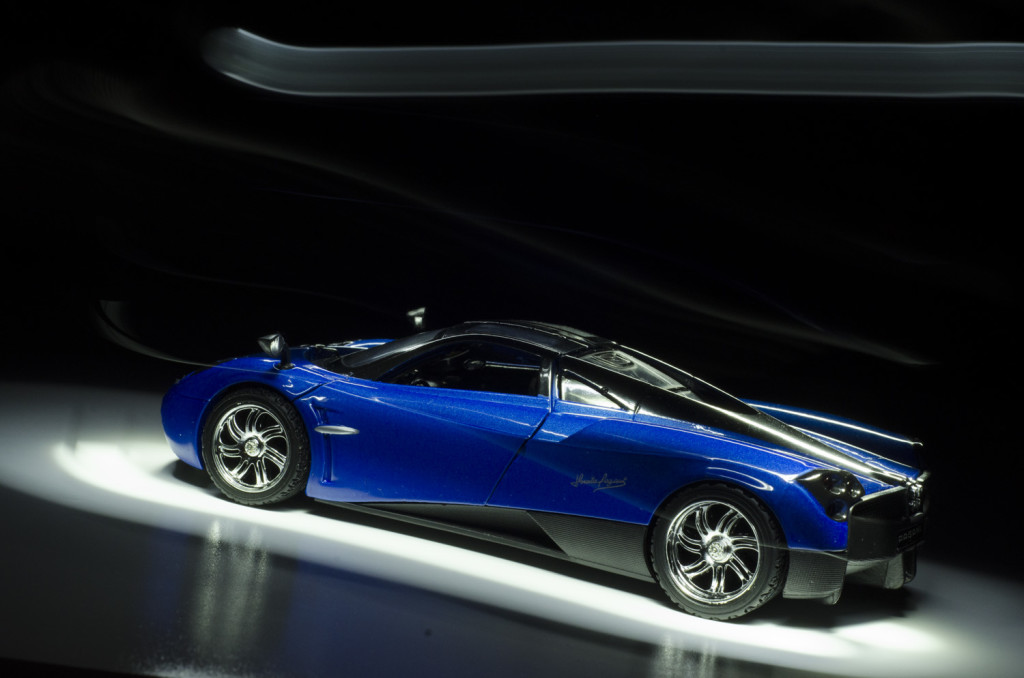
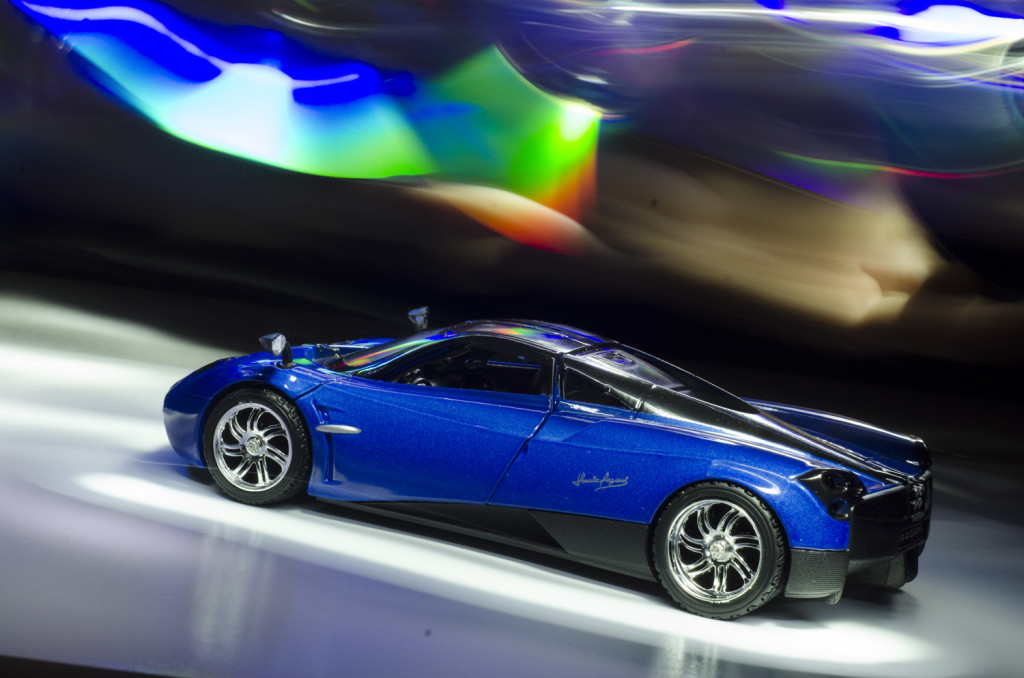
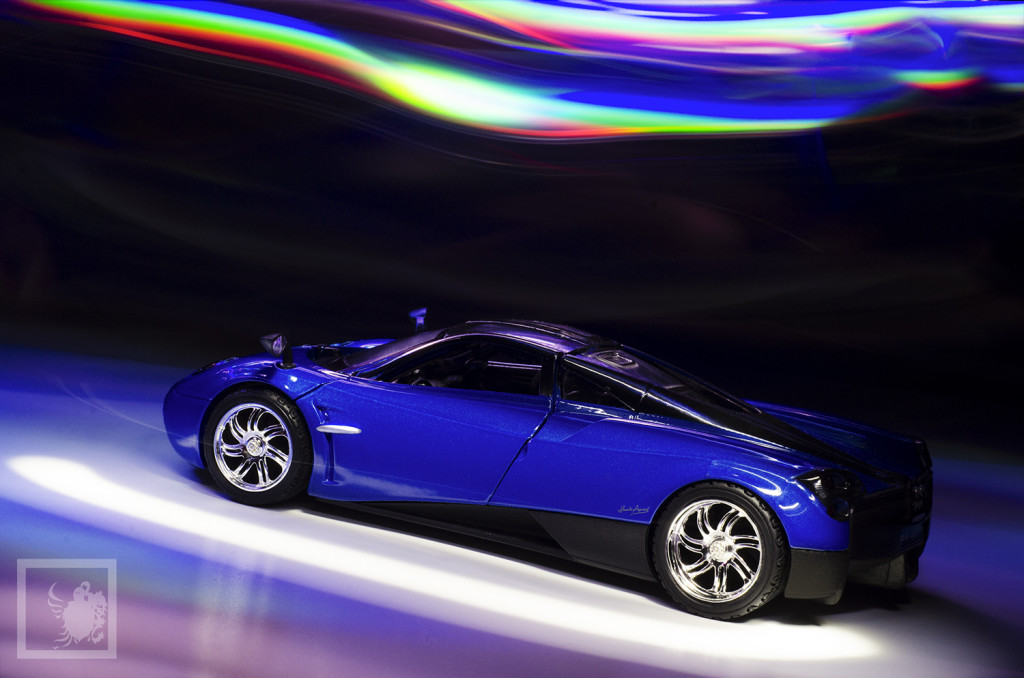
The shot above was a first attempt with the CD. I wasn’t happy with the car. I felt that the top of the car was too dark, and was getting lost in the background. Also the effect from the CD was less than amazing.
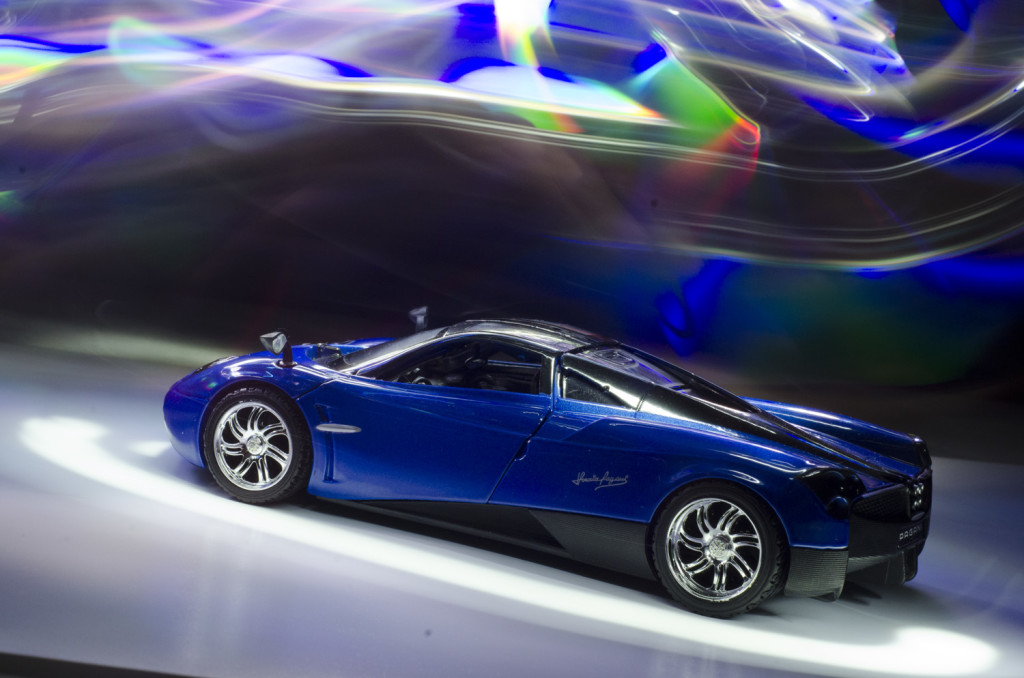
This image was getting much better. I love the reflection on the car, and I felt the lighting on the car was better. At the time I felt that the CD graphic and the car were competing a little too much, so I kept shooting. As I am typing this and looking at the image, I am starting to fall more in love with this particular shot. Also it looks like a lion head streaking through the image. I believe that is my hand being illuminated. Anyways I will continue with my post as planned, and add in a finished edit of this image at the end. It would be cool if you could let me know which you like best.
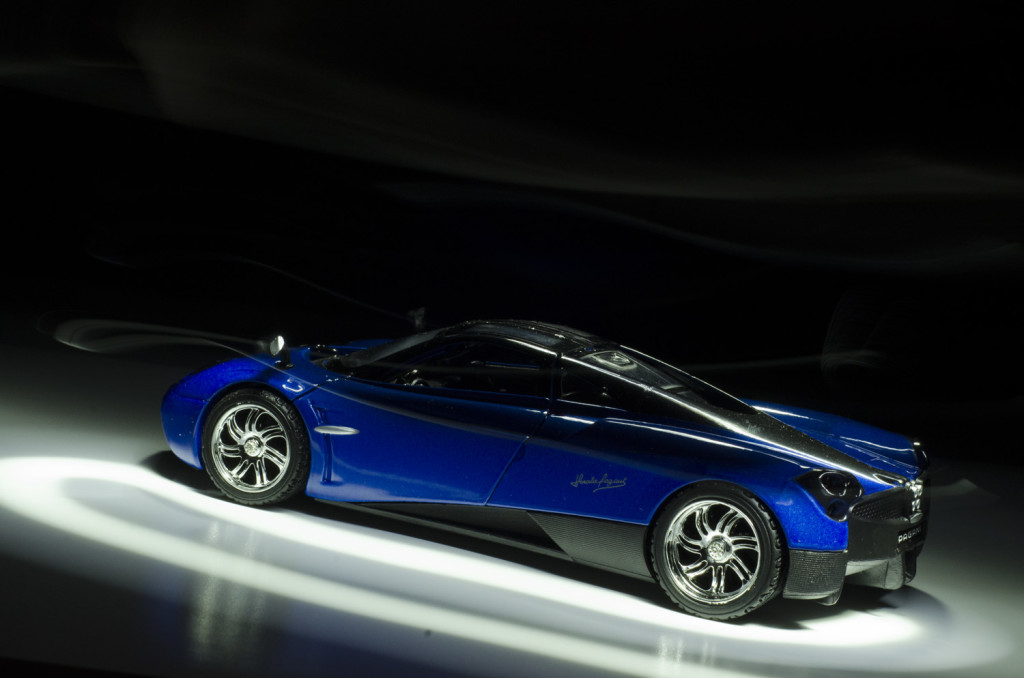
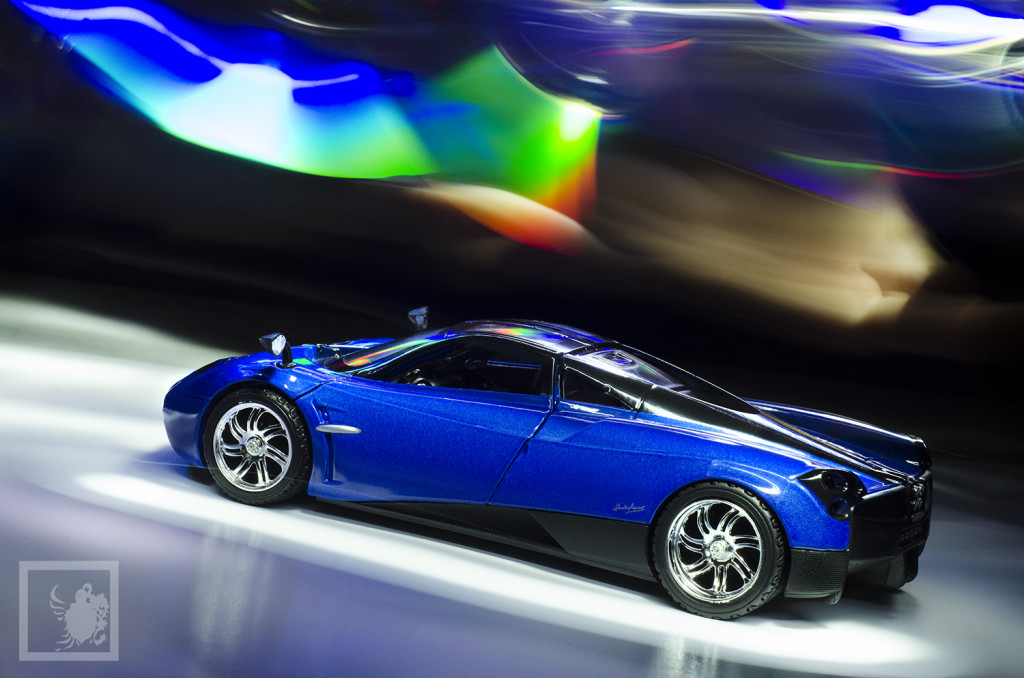
While I can say that I liked each shot I was getting, I wanted to balance the image out. The shot above is way to messy. I ended up with this shot below.
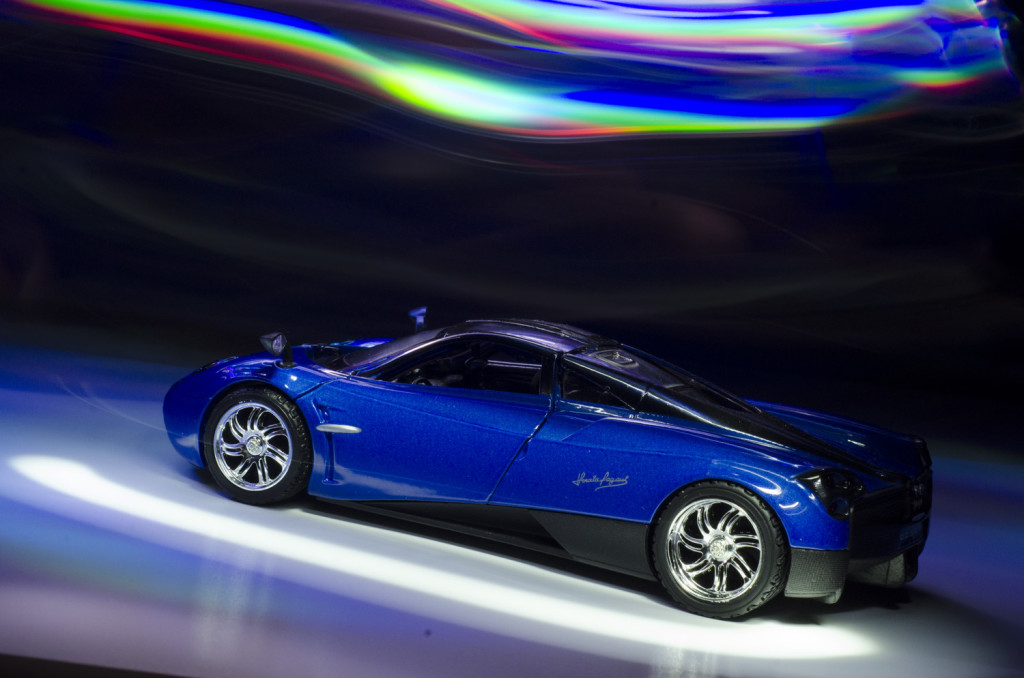
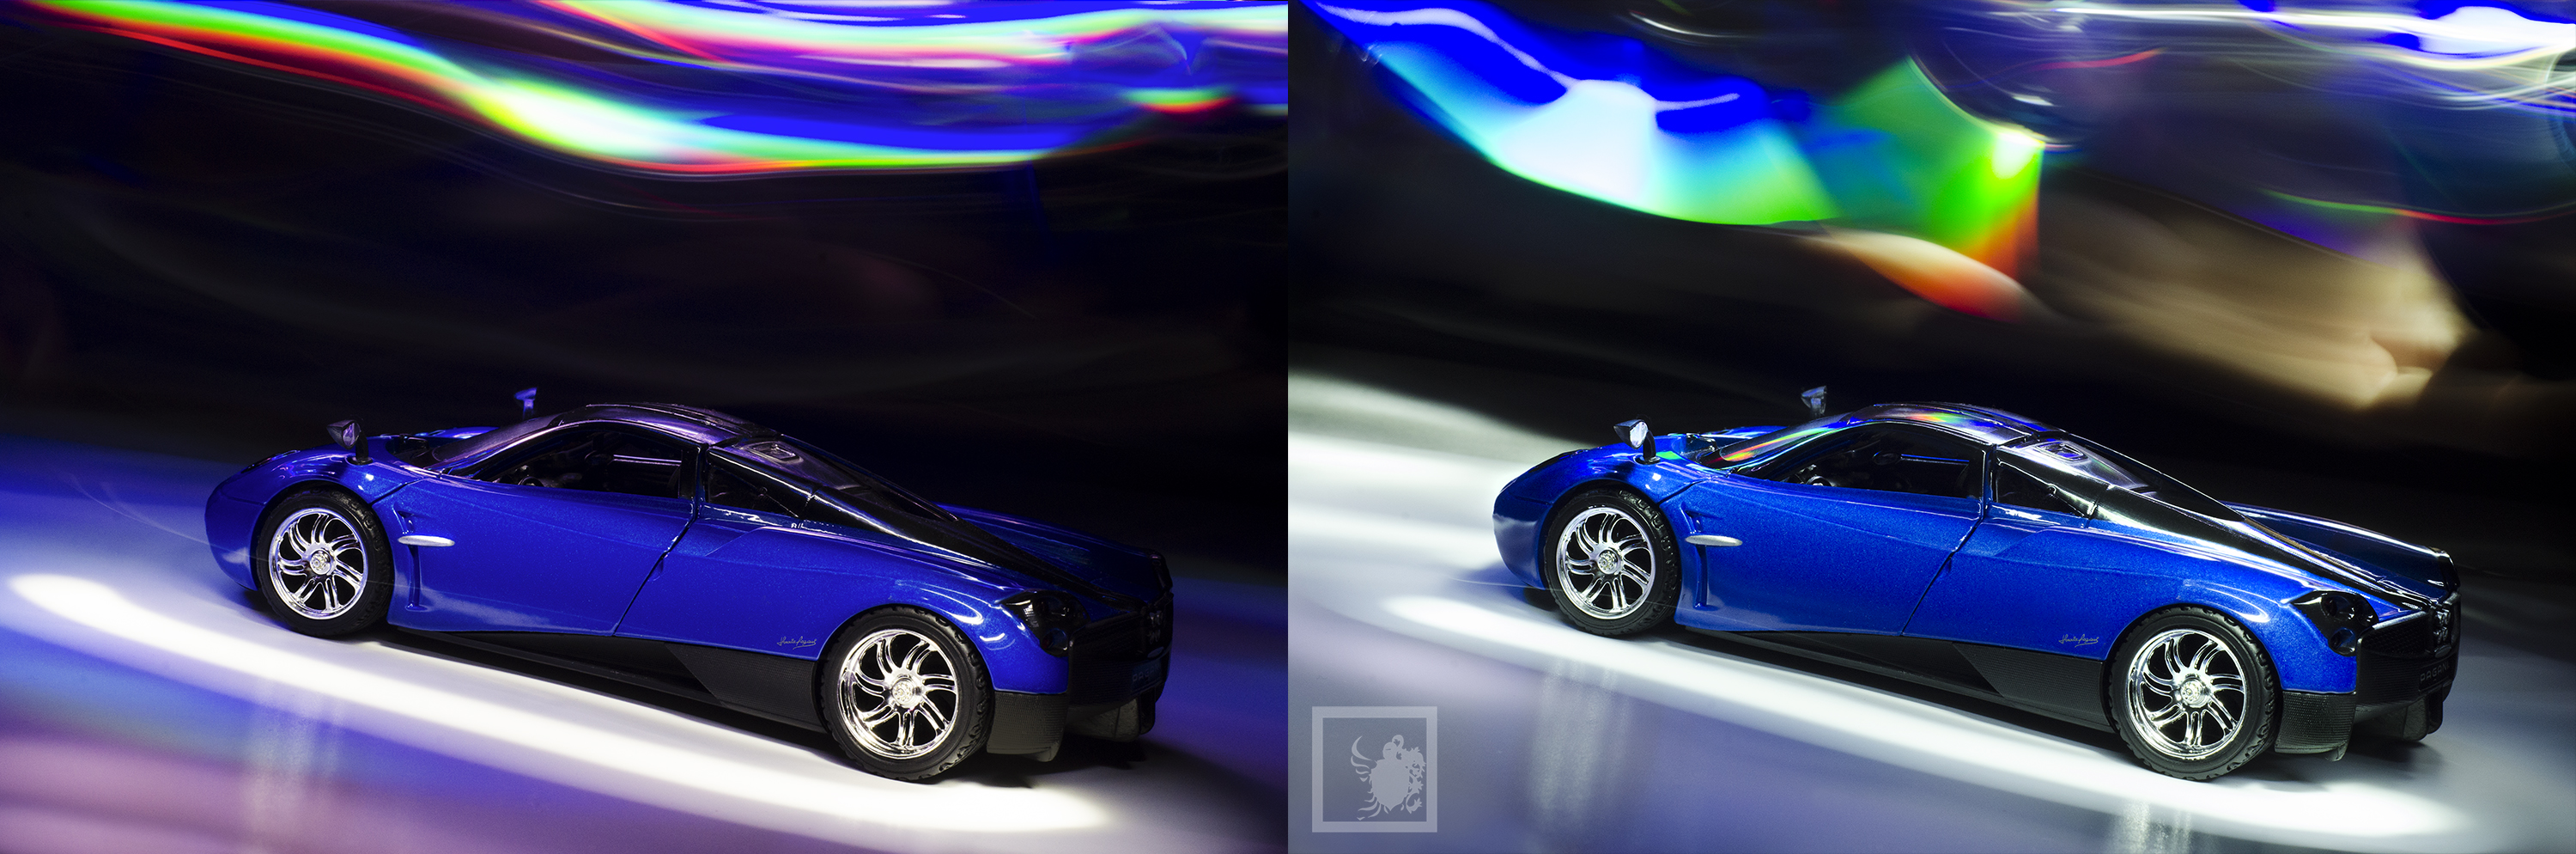
There are a few key points I like about this image. The CD graphic is simple, yet strong. The car is well lit and doesn’t compete too much with the CD graphic. Also the line that the CD made and the car mirror each other in a way. I didn’t like the fact that the CD graphic ended before the edge of the frame, and I also dislike the black space in the lower left hand corner, so I headed to photoshop to manipulate my image. I would rather fix this issues in the camera, but I learned Photoshop for a reason, so now is the time to alter this photograph into a piece of artwork.
As you can see, I used the clone tool to fix the corners of the image. I also used curves and levels to adjust the contrast and vibrance, and cleaned up the dirt that was on the lens. If you look closely you will notice I took the Pagani Huayra logo, shrunk it down and moved it. I did this to mimic what the full size car actually looks like.
I am pretty happy with the result but there are many things I would like to improve on. I would have liked to get more light on the rear end of the car. I would also have liked to get some nice accent lines running along the car just below the windows along the top of the doors and fenders, and I it would be nice to have not needed to manipulate the corners in photoshop to clean up the image. It is a step in the right direction and I am excited to keep moving that direction.
Thanks for following along. If you have any feedback, feel free to leave a comment.
Oh wait! Don’t go! So I went back and edited the image I showed you earlier that I started to take a liking towards. Let me know which image is your favorite and why.
You must log in to post a comment.